Hello! I’m HAYAO, a programmer at HazeDenki Inc.
If you’d like, please follow me on Twitter(X) as well.
I’m continuing this series based on the outline I shared earlier.
You can jump to the previous entries:
- Building the foundation for a visual novel: where to start?
- Choosing a Visual Novel engine — Utage vs Naninovel
- Setting up the development environment
- Customizing the VN engine with AI
- Several deep dives into Naninovel features(this post)
Now that we’ve finished the steps for installing Naninovel and setting up the development workflow, I’d like to start posting tips about Naninovel—such as how to add features—while also touching on our game project.
This time, I’ll show how to add a custom command.
I’ll split this into two parts: the first half covers how to create a custom command; the second half shows how to use it to trigger a home-made screen effect. The latter got quite long, so I’ve separated it out…
Part 1 is a basic custom command you can implement quickly. Part 2 assumes you’ll use AI and involves changes using shaders and post-processing, so it assumes you’ve already completed the steps in “How to customize the engine source together with AI.”
Alright—let’s walk through how to add a custom command.
Flow to create your own custom command
We’ll make a simple command and run it.
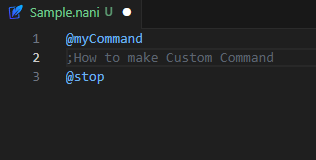
First, create the following file:
using Naninovel;
using UnityEngine;


[CommandAlias("myCommand")]
public class MyCommand : Command
{
    public override UniTask Execute(AsyncToken asyncToken = default)
    {
        Debug.Log("Hello!");
        return UniTask.CompletedTask;
    }
}
Then create a Naninovel Script to execute the command.
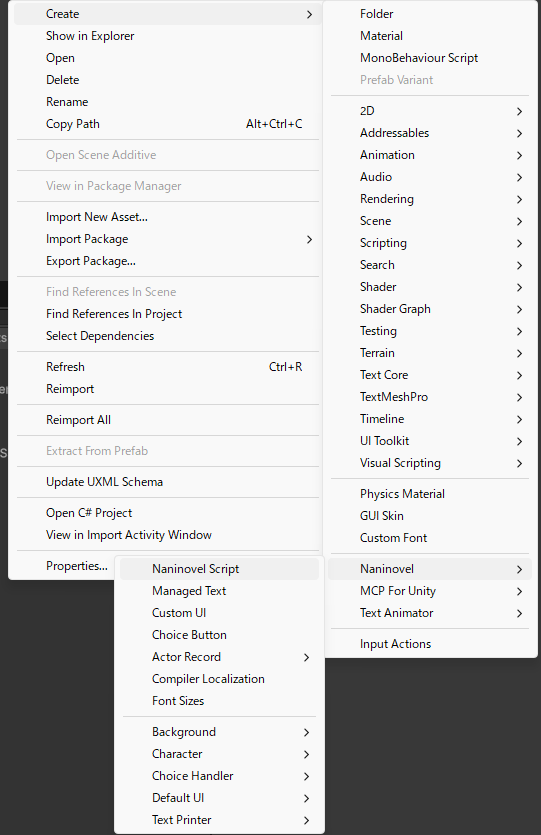
In the Unity Project window, create a “Naninovel Script.” The name can be anything.
Once you’ve created the script, open Naninovel → Configuration → Scripts and set the Start Game Script to the file you just made. (This is only for a quick test; if you’ve already started building your game, you don’t need to change your current setting.)

Next, open the script file. This assumes you completed the setup from the previous post (VS Code integration + Naninovel extension installed).
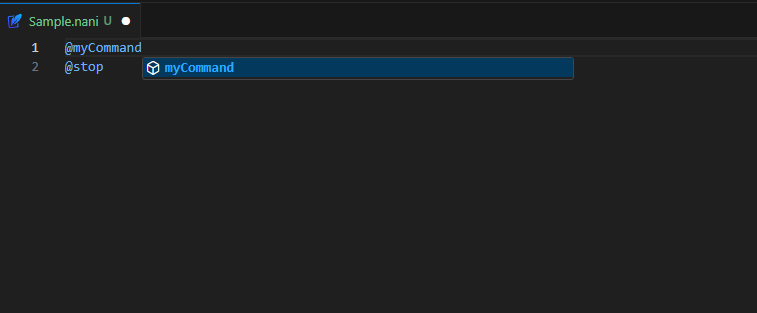
Type @myCommand. If it’s recognized as a Naninovel custom command, your implementation is complete.
Run the game and check that “Hello!” appears in the log.
About the alias used for custom commands
Let’s go over the program in detail.
using Naninovel;
using UnityEngine;
---①----

② [CommandAlias("myCommand")]

③ public class MyCommand : Command
{
  ④ public override UniTask Execute(AsyncToken asyncToken = default)
    {
        Debug.Log("Hello!");
        return UniTask.CompletedTask;
    }
}
① using statements
- using Naninovel; → Enables Naninovel core features. Required here because we inherit from Command.
- using UnityEngine; → Needed to use Debug.Log.
② CommandAlias attribute (decides the command’s name)
- "myCommand" becomes the name you use in a nani script.
- This name must not duplicate another command or you’ll get an error.
Examples:

[CommandAlias("flash")] → use as @flash in nani
[CommandAlias("customSave")] → use as @customSave in nani
③ Class declaration (must inherit Command)
- You override Execute from Command to define what the command does.
④ Execute method (the actual logic)
- This is the implementation of the abstract Execute defined in Command.
Rules:
- The return type must be UniTask.
- Conclude with return UniTask.CompletedTask;
That covers the sample program above.
As one extension, here’s an example of a parameterized command (you don’t have to implement this now—this is a preview for the next post where we’ll call a “screen effect” with a custom command).
using Naninovel;
using UnityEngine;


[CommandAlias("setActive")]
public class SetActiveCommand : Command
{
    [ParameterAlias("target"), RequiredParameter]
    public StringParameter Target;

    [ParameterAlias("active")]
    public BooleanParameter Active;


    public override UniTask Execute(AsyncToken asyncToken = default)
    {
        // Get parameters
        string targetName = Target;
        bool isActive = Active ?? true; // default is true

        // Find the GameObject
        GameObject targetObject = GameObject.Find(targetName);

        // If not found
        if (targetObject == null)
        {
            Debug.LogWarning($"GameObject '{targetName}' was not found.");
            return UniTask.CompletedTask;
        }

        // Toggle active state
        targetObject.SetActive(isActive);
        Debug.Log($"{targetName} was set to {(isActive ? "active" : "inactive")}.");

        return UniTask.CompletedTask;
    }
}
The key point in the code above is the use of ParameterAlias.
When you define ParameterAlias, you can pass values to your custom command as arguments, like this:
@setActive target:Player active:false
; ↑ Deactivate the GameObject named "Player"

@setActive target:Enemy active:true
; ↑ Activate the GameObject named "Enemy"
The variable types are Naninovel-specific. Please refer to the docs.
In practice, you’ll mostly use StringParameter, DecimalParameter, and BooleanParameter.

In the next, more advanced custom command, we’ll use DecimalParameter for effect intensity, and BooleanParameter to toggle enable/disable.
For reference, here’s what the arguments look like for an effect I’m currently implementing:
@dizzy start:true intensity:0.7 distortion:0.04 distortionSpeed:1 pulse:true pulseFreq:2 pulseAmp:0.3 vignette:0.42 blur:1.4 desaturation:0.28 brightness:0.88 innerRadius:0.3 outerRadius:0.6 falloff:2.5 tint:#FF000066 duration:2 wait:true
…There are so many settings that it’s become hard to explain properly—so I’ll clean this up before the next post.
In the next article, I’ll walk through the implementation of the effect call.
This time was foundational, but I hope you got a taste of the joy of running a command you made yourself.
->next article

Thank you for reading, and please continue to support HazeDenki.
Comments (3)
Leave a comment