
HazeDenki株式会社のプログラマーを担当しているHAYAOと申します。
良かったらTwitter(X)もフォローしてね。
前回までの記事は以下から飛べます。
- ノベルゲームの基盤を作る。まず何をする?
- ノベルゲームエンジンの選定。宴とNaniNovelの特徴について
- 開発環境のセットアップ
- ノベルゲームエンジンのソースをAIとカスタマイズしていく方法
- NaniNovelの機能についての解説:カスタムコマンドの作成
前回はカスタムコマンドを追加する方法について紹介しました。
しかし、前回例示したものはあくまで試験的なもので実用的ではなかったので、今回は作品に実際使えるレベルのコードを紹介していきます。
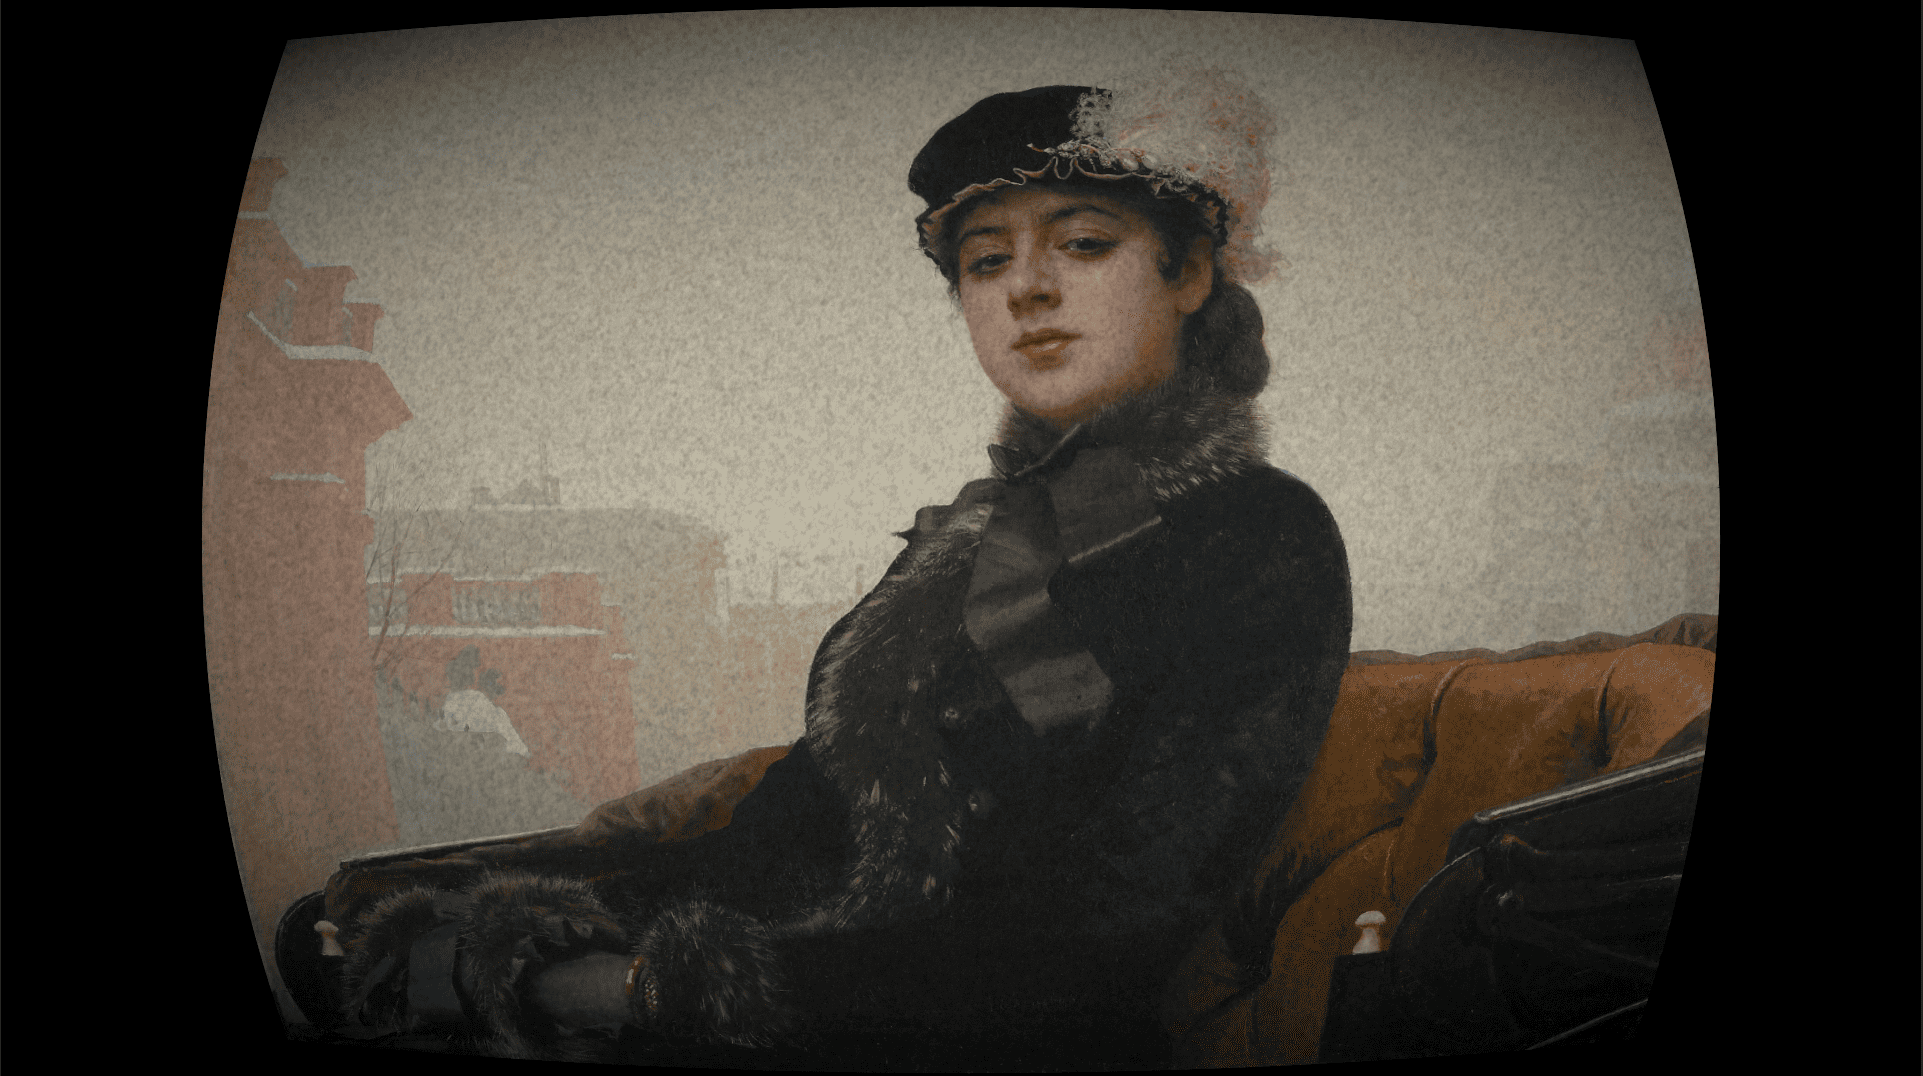
今回紹介する実装を終えると適用可能になるカスタムコマンドの効果は以下のようなものです。
適用前
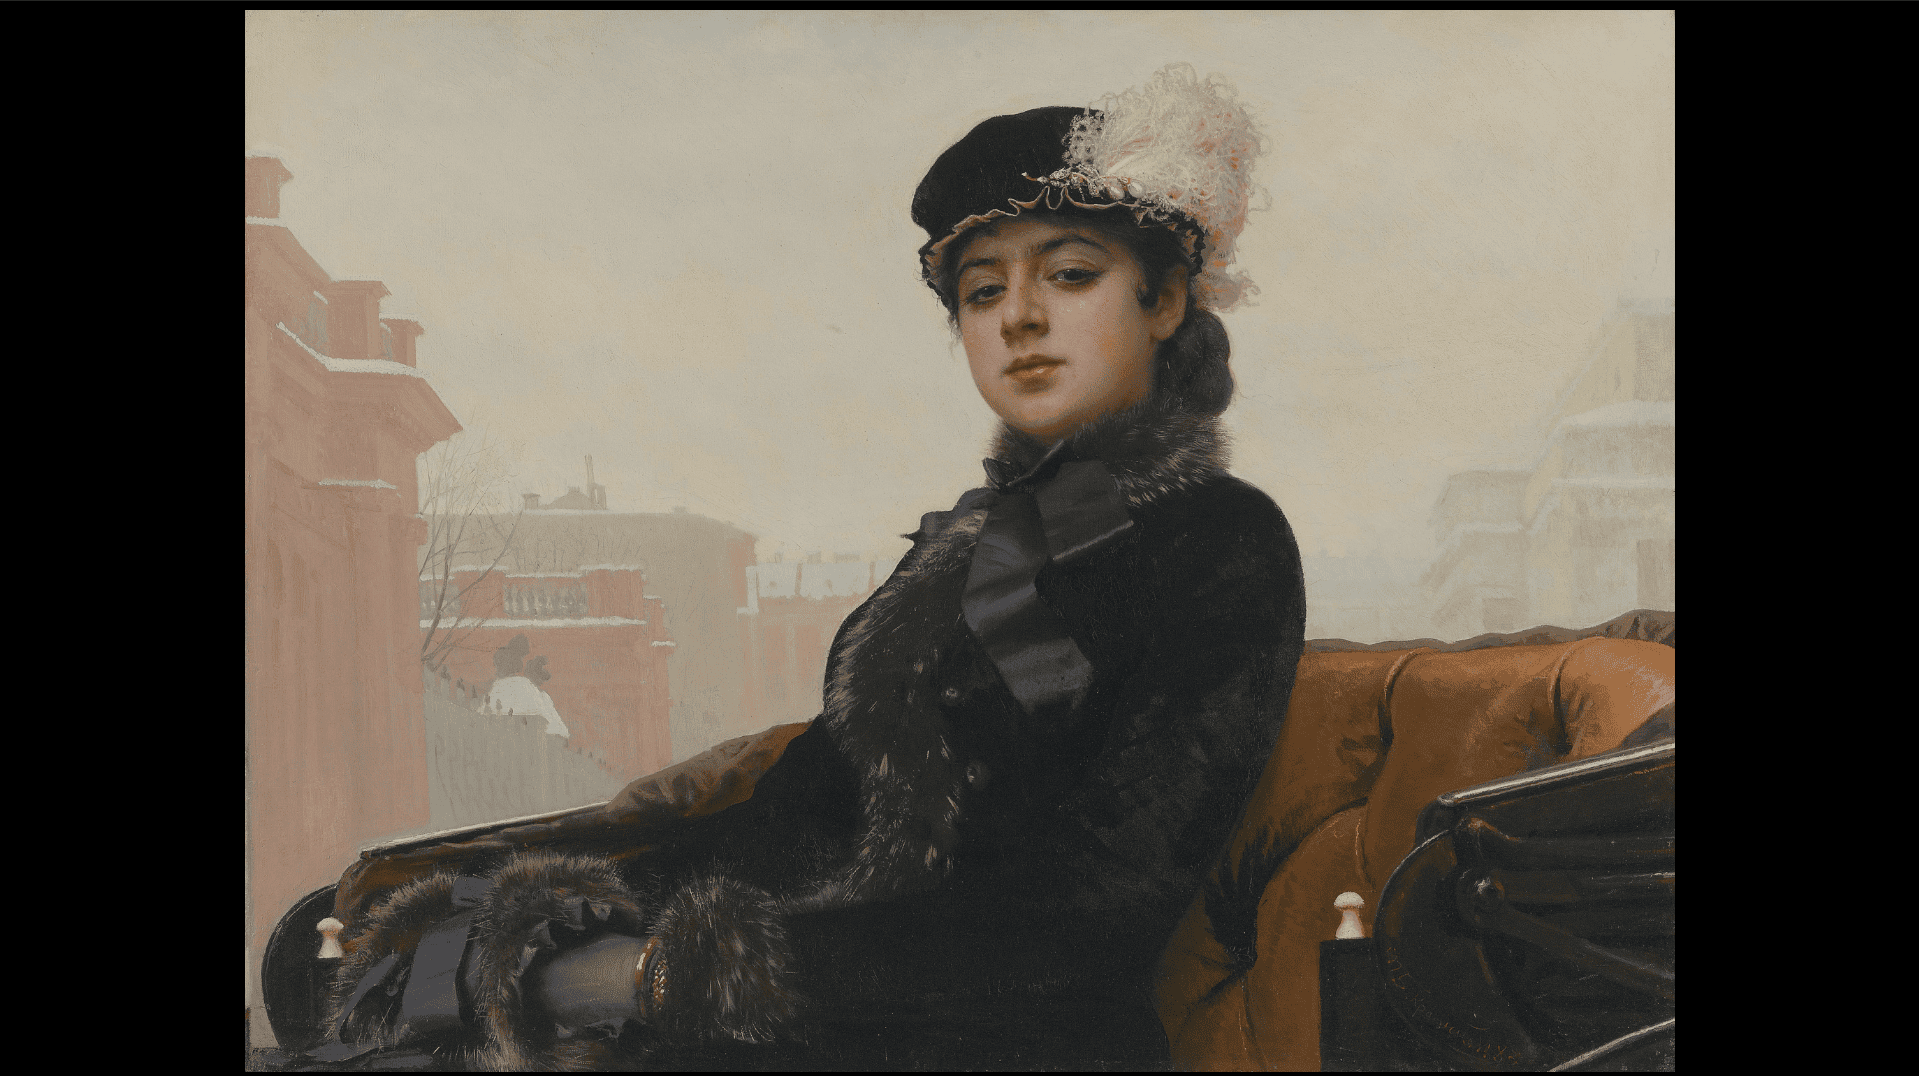
適用後

レンズ歪み+ノイズ+ビネット効果をスクリーンに適用するカスタムコマンドとなります。
1.準備
まず以下をクリアしていることを前提とします。
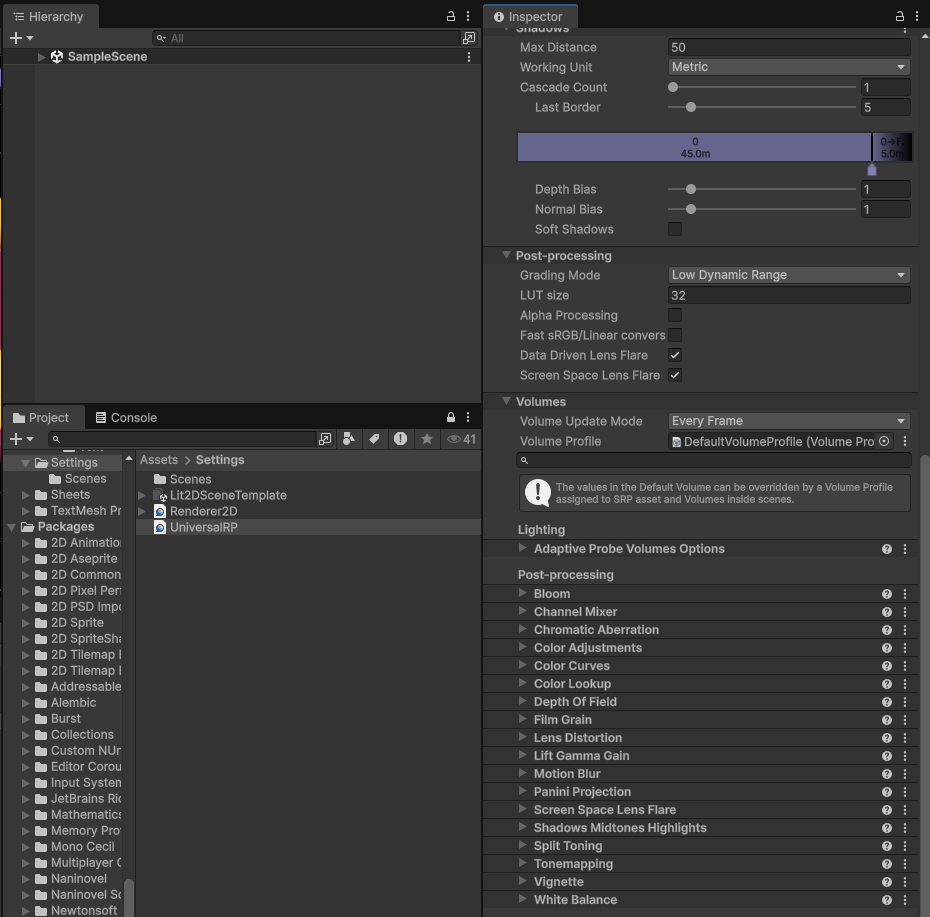
- ポストプロセスを適用できるURPのプロジェクトであること
- DefaultVolumeProfileをUniversalRenderPipeLineのVolumeに設定している
DefaultVolumeProfileの設定例

UniversalRenderPipeLineの設定例
2.仕様検討
まずはどのようなカスタムコマンドでこの効果を適用したいか明確にします。
今回は、以下のようなコマンドでエフェクトをシナリオ中に適用できることを目指します。
エフェクト名はFilmLookと名付けます。
 @filmLook ; 効果適用
 @filmLook stop:true ; エフェクト停止
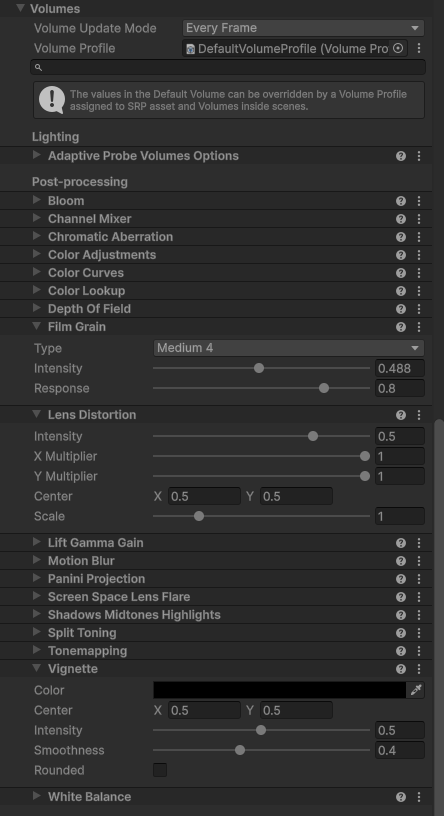
次に画面効果をどの程度適用するのがベストか探っていきましょう。
GameをPlayモードにしながら、先ほどのDefaultVolumeProfileを弄って探します。
今回は以下の設定を目標値とします。
FilmGrain, LensDistortion, Vignetteに注目してください。
また、ノベルゲームということで、セーブロードタイトルバックした際に画面エフェクト効果が正常に切り替わらなければなりません。
スクリプト上のコマンド実行以外にも、システム周りとの連携を行う必要があることを頭に入れておきましょう。
上記の検討の結果、以下の2ファイルを実装することを決定しました。
- FilmLook.cs:カスタムコマンド実行クラス。コマンドに応じてVolumeProfileの値を変更する。
- FilmLookController.cs:FilmLook効果をNaniNovelのセーブロード等のシステム周りと連携させるためのコントローラクラス
3.実装
ということで、2ファイル実装しました。
コードを見せてから解説する方が早いと思うので全文貼ります。
また、NaniNovelのセーブロード周りとの連携は完全にAI調査をベースにしたものであり、複雑なのでコードを実行して動きを見たほうが早いです。
◆FilmLook.csの解説
コード
using Naninovel;
using Naninovel.Commands;
using System;
using UnityEngine;
using UnityEngine.Rendering;
using UnityEngine.Rendering.Universal;


namespace CustomCommands
{
    /// <summary>
    /// フィルムルックエフェクトを適用する
    /// 使用例:
    /// @filmLook
    /// @filmLook stop:true
    /// </summary>
    [CommandAlias("filmLook")]
    public class FilmLook : Command
    {
        /// <summary>
        /// エフェクトを停止する
        /// </summary>
        [ParameterAlias("stop")]
        public BooleanParameter StopEffect;

        private Vignette vignette;
        private FilmGrain filmGrain;
        private LensDistortion lensDistortion;


        public override async Naninovel.UniTask Execute(AsyncToken asyncToken = default)
        {
            // VolumeStackから各コンポーネントを取得
            var volumeStack = VolumeManager.instance.stack;
            vignette = volumeStack.GetComponent<Vignette>();
            filmGrain = volumeStack.GetComponent<FilmGrain>();
            lensDistortion = volumeStack.GetComponent<LensDistortion>();


            // エラーチェック
            if (vignette == null || filmGrain == null || lensDistortion == null)
            {
                Debug.LogError("[FilmLook] Volume components not found in Volume Stack!");
                return;
            }


            // 停止処理
            if (StopEffect)
            {
                ResetEffect();
                SaveState();
                return;
            }

            ApplyEffect();
            SaveState();

            await Naninovel.UniTask.CompletedTask;
        }


        private void ApplyEffect()
        {
            // Vignette設定
            vignette.active = true;
            vignette.intensity.value = 0.5f;
            vignette.smoothness.value = 0.4f;
            vignette.rounded.value = false;


            // Film Grain設定
            filmGrain.active = true;
            filmGrain.type.value = FilmGrainLookup.Medium4; // Medium4タイプ
            filmGrain.intensity.value = 0.5f;
            filmGrain.response.value = 0.8f;


            // Lens Distortion設定
            lensDistortion.active = true;
            lensDistortion.intensity.value = 0.5f;
            lensDistortion.xMultiplier.value = 1.0f;
            lensDistortion.yMultiplier.value = 1.0f;
            lensDistortion.center.value = new Vector2(0.5f, 0.5f);
            lensDistortion.scale.value = 1.0f;


            Debug.Log("[FilmLook] applied successfully");
        }


        private void ResetEffect()
        {
            // Vignetteをリセット
            vignette.intensity.value = 0f;
            vignette.smoothness.value = 0.2f;
            vignette.rounded.value = false;
            vignette.center.value = new Vector2(0.5f, 0.5f);
            vignette.active = false;


            // Film Grainをリセット
            filmGrain.intensity.value = 0f;
            filmGrain.type.value = FilmGrainLookup.Thin1;
            filmGrain.response.value = 0.8f;
            filmGrain.active = false;


            // Lens Distortionをリセット
            lensDistortion.intensity.value = 0f;
            lensDistortion.xMultiplier.value = 1f;
            lensDistortion.yMultiplier.value = 1f;
            lensDistortion.center.value = new Vector2(0.5f, 0.5f);
            lensDistortion.scale.value = 1f;
            lensDistortion.active = false;


            Debug.Log("[FilmLook] Effect reset successfully");
        }


        private void SaveState()
        {
            // カスタム変数に状態を保存
            try
            {
                var vars = Engine.GetService<ICustomVariableManager>();
                bool isEnabled = vignette.active || filmGrain.active || lensDistortion.active;
                vars.SetVariableValue("IsFilmLookEnabled", new(isEnabled));

                Debug.Log($"[FilmLook] State saved: IsFilmLookEnabled = {isEnabled}");
            }
            catch (Exception ex)
            {
                Debug.LogWarning($"[FilmLook] Failed to set custom variables: {ex.Message}");
            }
        }
    }
}
◆解説
・カスタムコマンド連携部分。コマンド名を定義している
namespace CustomCommands
{
    [CommandAlias("filmLook")]
    public class FilmLook : Command
    {
・コマンドのパラメータエイリアス。stop:trueの引数があるとき、エフェクトを停止する。
[ParameterAlias("stop")]
 public BooleanParameter StopEffect;

~~~

 // 停止処理
 if (StopEffect)
 {
    ResetEffect();
    SaveState();
    return;
 }
・DefaultVolumeProfileの取得処理
 private Vignette vignette;
 private FilmGrain filmGrain;
 private LensDistortion lensDistortion;

~~~

// VolumeStackから各コンポーネントを取得
 var volumeStack = VolumeManager.instance.stack;
 vignette = volumeStack.GetComponent<Vignette>();
 filmGrain = volumeStack.GetComponent<FilmGrain>();
 lensDistortion = volumeStack.GetComponent<LensDistortion>();
・調査で決めた目標値になるようにエフェクトを適用している箇所
        private void ApplyEffect()
        {
            // Vignette設定
            vignette.active = true;
            vignette.intensity.value = 0.5f;
            vignette.smoothness.value = 0.4f;
            vignette.rounded.value = false;


            // Film Grain設定
            filmGrain.active = true;
            filmGrain.type.value = FilmGrainLookup.Medium4; // Medium4タイプ
            filmGrain.intensity.value = 0.5f;
            filmGrain.response.value = 0.8f;


            // Lens Distortion設定
            lensDistortion.active = true;
            lensDistortion.intensity.value = 0.5f;
            lensDistortion.xMultiplier.value = 1.0f;
            lensDistortion.yMultiplier.value = 1.0f;
            lensDistortion.center.value = new Vector2(0.5f, 0.5f);
            lensDistortion.scale.value = 1.0f;


            Debug.Log("[FilmLook] applied successfully");
        }

・システムとの連携に必須となる部分
private void SaveState()
        {
            // カスタム変数に状態を保存
            try
            {
                var vars = Engine.GetService<ICustomVariableManager>();
                bool isEnabled = vignette.active || filmGrain.active || lensDistortion.active;
                vars.SetVariableValue("IsFilmLookEnabled", new(isEnabled));

                Debug.Log($"[FilmLook] State saved: IsFilmLookEnabled = {isEnabled}");
            }
            catch (Exception ex)
            {
                Debug.LogWarning($"[FilmLook] Failed to set custom variables: {ex.Message}");
            }
        }
ここでは、NaniNovelのカスタム変数を用いてFilmLook効果が適用されているかどうかの状態を保存します。
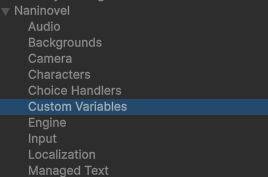
ProjectSettingから、NaniNovel->Custom Variablesを開いて、
IsFilmLookEnabled : falseと変数を登録しておいてください。
◆FilmLookController.csの解説
コード
using Naninovel;
using System;
using UnityEngine;
using UnityEngine.Rendering;
using UnityEngine.Rendering.Universal;


namespace RenderEffect
{
    /// <summary>
    /// フィルムルックエフェクトの状態管理
    /// </summary>
    [InitializeAtRuntime]
    public class FilmLookController : IEngineService, IStatefulService<GameStateMap>
    {
        [Serializable]
        public class FilmLookState
        {
            public bool IsFilmLookEnabled = false;
        }


        private Vignette vignette;
        private FilmGrain filmGrain;
        private LensDistortion lensDistortion;


        public bool IsFilmLookEnabled =>
            (vignette != null && vignette.active) ||
            (filmGrain != null && filmGrain.active) ||
            (lensDistortion != null && lensDistortion.active);


        // Volume参照を取得
        private void GetVolumeComponents()
        {
            var volumeStack = VolumeManager.instance.stack;
            vignette = volumeStack.GetComponent<Vignette>();
            filmGrain = volumeStack.GetComponent<FilmGrain>();
            lensDistortion = volumeStack.GetComponent<LensDistortion>();


            if (vignette == null || filmGrain == null || lensDistortion == null)
            {
                Debug.LogWarning($"[FilmLookController] Volume components not found");
            }
        }


        // 現在の状態を取得
        public FilmLookState GetCurrentState()
        {
            GetVolumeComponents();

            return new FilmLookState
            {
                IsFilmLookEnabled = IsFilmLookEnabled
            };
        }


        // プリセットを適用
        public void ApplyPreset()
        {
            GetVolumeComponents();

            if (vignette == null || filmGrain == null || lensDistortion == null)
                return;


            // Vignette
            vignette.active = true;
            vignette.intensity.value = 0.5f;
            vignette.smoothness.value = 0.4f;
            vignette.rounded.value = false;


            // Film Grain
            filmGrain.active = true;
            filmGrain.type.value = FilmGrainLookup.Medium4;
            filmGrain.intensity.value = 0.5f;
            filmGrain.response.value = 0.8f;


            // Lens Distortion
            lensDistortion.active = true;
            lensDistortion.intensity.value = 0.5f;
            lensDistortion.xMultiplier.value = 1.0f;
            lensDistortion.yMultiplier.value = 1.0f;
            lensDistortion.center.value = new Vector2(0.5f, 0.5f);
            lensDistortion.scale.value = 1.0f;


            Debug.Log("[FilmLookController] Preset applied");
        }


        // エフェクトをリセット
        public void ResetEffects()
        {
            GetVolumeComponents();

            if (vignette == null || filmGrain == null || lensDistortion == null)
                return;


            vignette.active = false;
            vignette.intensity.value = 0f;
            vignette.smoothness.value = 0.2f;
            vignette.rounded.value = false;
            vignette.center.value = new Vector2(0.5f, 0.5f);


            filmGrain.active = false;
            filmGrain.intensity.value = 0f;
            filmGrain.type.value = FilmGrainLookup.Thin1;
            filmGrain.response.value = 0.8f;


            lensDistortion.active = false;
            lensDistortion.intensity.value = 0f;
            lensDistortion.xMultiplier.value = 1f;
            lensDistortion.yMultiplier.value = 1f;
            lensDistortion.center.value = new Vector2(0.5f, 0.5f);
            lensDistortion.scale.value = 1f;


            Debug.Log("[FilmLookController] Effects reset");
        }


        public UniTask InitializeService()
        {
            GetVolumeComponents();
            ResetEffects();
            Debug.Log("[FilmLookController] Service initialized");
            return UniTask.CompletedTask;
        }


        public void ResetService()
        {
            try
            {
                var vars = Engine.GetService<ICustomVariableManager>();
                var filmLookValue = vars.GetVariableValue("IsFilmLookEnabled");

                if (filmLookValue != null && filmLookValue.Type == CustomVariableValueType.Boolean && !filmLookValue.Boolean)
                {
                    ResetEffects();
                }
            }
            catch (Exception e)
            {
                Debug.LogError($"[FilmLookController] Failed to reset: {e}");
            }
        }


        public void DestroyService()
        {
            ResetEffects();
            Debug.Log("[FilmLookController] Service destroyed");
        }


        public void SaveServiceState(GameStateMap stateMap)
        {
            var state = GetCurrentState();
            stateMap.SetState(state);
            Debug.Log($"[FilmLookController] State saved - IsEnabled:{state.IsFilmLookEnabled}");
        }


        public async UniTask LoadServiceState(GameStateMap stateMap)
        {
            var state = stateMap.GetState<FilmLookState>() ?? new FilmLookState();

            try
            {
                Debug.Log($"[FilmLookController] LoadServiceState started - IsEnabled:{state.IsFilmLookEnabled}");

                // VolumeStackの初期化を待つ
                await WaitForVolumeStackInitialization();

                // 状態を復元
                if (state.IsFilmLookEnabled)
                {
                    await UniTask.Yield(PlayerLoopTiming.Update);
                    ApplyPreset();
                }
                else
                {
                    ResetEffects();
                }
            }
            catch (Exception e)
            {
                Debug.LogError($"[FilmLookController] Failed to load state: {e}");
            }
        }


        private async UniTask WaitForVolumeStackInitialization()
        {
            int maxRetries = 50;
            int retryCount = 0;

            while (retryCount < maxRetries)
            {
                vignette = null;
                filmGrain = null;
                lensDistortion = null;

                GetVolumeComponents();

                if (vignette != null && filmGrain != null && lensDistortion != null)
                {
                    Debug.Log($"[FilmLookController] VolumeStack initialized after {retryCount} retries");
                    return;
                }

                retryCount++;
                await UniTask.Yield(PlayerLoopTiming.Update);
            }

            Debug.LogWarning($"[FilmLookController] VolumeStack initialization timeout after {maxRetries} retries");
        }
    }
}
めちゃくちゃAIに頼って実装した部分です。NaniNovelのセーブロード時に読み込むGameStateMapデータにFilmLookの適用状態を保存できるようにしています。
また、エンジンのインターフェースを用いて、ゲームリセット時にポストプロセスが解除されるような処理も入っています。一つずつ解説していきます。
・インターフェースの継承
    /// <summary>
    /// フィルムルックエフェクトの状態管理
    /// </summary>
    [InitializeAtRuntime]
    public class FilmLookController : IEngineService, IStatefulService<GameStateMap>
    {
NaniNovelのエンジンサービス用のインターフェースと、セーブデータ操作用のGameStateMap用インターフェースを継承します。
それぞれのインターフェースで実装したものを見ていきましょう
●IEngineServiceインターフェース
1. UniTask InitializeService()
呼び出しタイミング: エンジン起動時、サービスが初めて初期化される時
public UniTask InitializeService()
{
  GetVolumeComponents(); // Volume参照を取得
  ResetEffects();     // 初期状態にリセット
  Debug.Log("[FilmLookController] Service initialized");
  return UniTask.CompletedTask;
}
ゲーム起動時に一度だけ呼ばれる。
今回はVolumeStackからVignette、FilmGrain、LensDistortionの参照を取得し、エフェクトをデフォルト状態(OFF)にリセット。
2. void ResetService()
呼び出しタイミング: シーンリセット時やタイトル画面に戻った時など
public void ResetService()
{
  try
  {
    var vars = Engine.GetService<ICustomVariableManager>();
    var filmLookValue = vars.GetVariableValue("IsFilmLookEnabled");

    if (filmLookValue != null &&
      filmLookValue.Type == CustomVariableValueType.Boolean &&
      !filmLookValue.Boolean)
    {
      ResetEffects();
    }
  }
  catch (Exception e)
  {
    Debug.LogError($"[FilmLookController] Failed to reset: {e}");
  }
}
カスタム変数 IsFilmLookEnabled をチェック。falseならエフェクトをリセット(OFFにする)。trueなら現在の状態を維持。
3. void DestroyService()
呼び出しタイミング: エンジン終了時、サービスが破棄される時
public void DestroyService()
{
  ResetEffects(); // エフェクトをOFFに戻す
  Debug.Log("[FilmLookController] Service destroyed");
}
ゲーム終了時やエディタでプレイモード終了時に呼ばれる。クリーンアップ処理を行う。
●IStatefulService<GameStateMap>インターフェース
セーブ/ロード機能を持つサービス用のインターフェース。ゲーム状態の保存と復元を管理。
1. void SaveServiceState(GameStateMap stateMap)
呼び出しタイミング: プレイヤーがセーブを実行した時
public void SaveServiceState(GameStateMap stateMap)
{
  var state = GetCurrentState(); // 現在の状態を取得
  stateMap.SetState(state);    // GameStateMapに保存
}
GetCurrentState() で現在のエフェクト有効状態を取得。
FilmLookState オブジェクト(IsFilmLookEnabledフラグのみ)を保存します。
セーブデータに状態が記録される
2. async UniTask LoadServiceState(GameStateMap stateMap)
呼び出しタイミング: プレイヤーがロードを実行した時
public async UniTask LoadServiceState(GameStateMap stateMap)
{
  var state = stateMap.GetState<FilmLookState>() ?? new FilmLookState();

  try
  {
    Debug.Log($"[FilmLookController] LoadServiceState started - IsEnabled:{state.IsFilmLookEnabled}");

    // VolumeStackの初期化を待つ
    await WaitForVolumeStackInitialization();

    // 状態を復元
    if (state.IsFilmLookEnabled)
    {
      await UniTask.Yield(PlayerLoopTiming.Update);
      ApplyPreset(); // プリセットを適用
    }
    else
    {
      ResetEffects(); // エフェクトをOFF
    }
  }
  catch (Exception e)
  {
    Debug.LogError($"[FilmLookController] Failed to load state: {e}");
  }
}
stateMap.GetState<FilmLookState>() でセーブデータから状態を取得
VolumeStackの初期化完了を待機。
IsFilmLookEnabled がtrueならプリセット適用、falseならリセット。
ロード後に、進行中のストーリーに応じてエフェクトが復元されます。
WaitForVolumeStackInitialization()を実装した理由は、ロード時に上手くVolumeProfileを読み込めないことが多々あり、リトライ機能が欲しいと感じたためです。
4.実行
以上で実装は終了!
CustomCommandとエンジン回りの実装なので、特にインスペクター周りの操作はありません。Configでカスタム変数"IsFilmLookEnabled"を作成する事だけ忘れないでください。
シナリオファイルに以下のように記述し、実行して見ましょう。
@hideAll

@filmLook

@wait 1
@back [任意の背景名] time1

@wait 1

@filmLook stop:true
背景にエフェクトが適用され、1秒後に正常に戻れば完璧です!
また、セーブロード周りの機能も試しておくといいでしょう。
5.応用
今回はFilmLookの実装を行いましたが、DefaultVolumeProfileにはほかの効果も沢山あります。
例えばBloom、ChannelMixerなど使ってみても面白いでしょう。
更に、DOTWEENを用いてレンズ歪みをスムーズにアニメーションするなども考えられます。
上記の改善案は、AIに今回の実装ファイルを基に改善するように依頼を投げるだけで実装出来ると思います。
AIとNaniNovelの連携はこの記事を参考にトライしてください。
ノベルゲームエンジンのソースをAIとカスタマイズしていく方法
そろそろ、今回の開発記事は終わりにします。
次回はデモ動画の実装解説にしようかなと考えています。
ここまで読んでくださった方、ありがとうございました。
HazeDenkiをよろしくお願いいたします。
コメント (2)
コメントを残す